

The most popular advice is to buy a spark plug by the equipment model. For spark plug 794 00082, that's often the slow way to solve the problem. This is a standardized OEM replacement used across multiple MTD-family brands and equipment types, so the part number is usually more useful than the badge on the chassis.
That doesn't mean every plug with a similar appearance will fit. Thread diameter, reach, hex size, gap, and engine-specific approval all matter. Use the number as a cross-reference, then verify the engine and the old plug before installation. That approach gets the right part on the first order and prevents a common mistake, replacing an ignition component when the actual fault is fuel, air, or carburetion.
Table of Contents
- What Spark Plug 794 00082 Actually Is
- Key Specifications and What Each Number Means
- Cross-Reference Numbers and Equivalent Plugs
- Brand and Equipment Coverage
- When to Replace the Plug
- Ruling Out Other Causes Before Blaming the Plug
- Installation and Gap Setup
- Quick Reference and Buying Checklist
What Spark Plug 794 00082 Actually Is
794-00082 is a shared OEM catalog number, not a component designed for one machine. MTD-family brands use the same replacement plug across equipment sold under names such as Craftsman, Cub Cadet, Troy-Bilt, Yard Man, Yard Machines, and Ryobi. Independent parts listings describe it as a replacement for engines in trimmers, blowers and vacuums, tillers, edgers, and cultivators. The eReplacementParts listing for 794-00082 also records its broad application across small-engine platforms.
That shared identity matters when you're ordering. A machine model can lead you toward a narrow listing, an obsolete number, or a plug intended for a different engine fitted to a similar chassis. The OEM number gives you a stronger starting point because it follows the engine service part through the MTD supply network.
Why the same number appears on different brands
The number has a substantial cross-reference history. It supersedes 49M0852K006, 49M0852L034, 753-05255, 753-05784, 791-180852, 791-180852B, 794-00042, and 794-00043, according to the Cub Cadet product listing for the part. That isn't the pattern of a single-application consumable. It indicates that MTD standardized one plug specification across multiple engine and equipment platforms.
The practical result is simple. If your old plug carries one of those earlier identifiers, a current 794-00082 listing may be the intended replacement. Still, don't skip the physical check. Hold the replacement beside the old plug and compare the thread, reach, hex, seat, and terminal before it enters the cylinder head.
Practical rule: Treat 794-00082 as a catalog cross-reference, then confirm the engine application. The brand badge alone isn't enough.
A broad cross-reference is similar to how a performance parts glossary helps separate a product label from the specification that controls fitment. The number tells you what to search for. The dimensions tell you whether it belongs in your engine.
Key Specifications and What Each Number Means
The common service data for 794-00082 identifies a 10 mm thread diameter, 12.7 mm reach, 16 mm hex, and 0.7 mm gap. Those measurements are listed in independent replacement-part catalogs, including the HIPA spark-plug collection. Each one is a workbench decision, not decoration on a product page.
The thread must engage correctly without forcing the aluminum head. The reach controls how far the firing end projects into the combustion chamber. The hex determines which socket will remove and install it. The gap controls the distance the ignition system must bridge.
| Specification | Metric | Imperial | Fitment Meaning |
|---|---|---|---|
| Thread diameter | 10 mm | Not specified | Must match the cylinder-head thread |
| Reach | 12.7 mm | Not specified | Controls electrode position and chamber clearance |
| Hex size | 16 mm | Not specified | Requires a matching spark-plug socket |
| Electrode gap | 0.7 mm | Not specified | Must be checked against the engine manual |
| Cross-reference | Champion RDZ4H | Not specified | Useful for catalog searches, subject to engine verification |
Thread and reach are hard limits
A plug with the wrong thread isn't a safe substitute. It can damage the head, fail to seal, or stop before the gasket seats. Reach is equally important because the firing end must occupy the position designed into the combustion chamber. A plug that projects too far can create a clearance problem, while one that sits too deep may foul more readily or produce poor ignition behavior.
The 16 mm hex also separates this plug from many automotive designs. Keep a slim spark-plug socket in your small-engine kit rather than assuming the larger socket used on a car will work.
Gap needs a physical check
Catalogs commonly cite a 0.7 mm gap, and independent listings cross-reference the plug to Champion RDZ4H. That doesn't remove the need to check the engine manual. Replacement plugs can arrive with a slightly different setting, and shipping or handling can move the ground electrode.
Use a wire-style gauge. If adjustment is necessary, move the ground electrode carefully. Don't pry against the ceramic insulator, and don't close the gap by striking the plug against a hard surface. For a dimension comparison, this APR spark-plug product page shows why plug dimensions must be considered as a complete set rather than as isolated numbers, even though it covers a different engine application.
Cross-Reference Numbers and Equivalent Plugs
The safest way to cross-reference 794-00082 is to start with the number stamped on the old plug or printed in the engine parts diagram. The current OEM number supersedes several earlier identifiers, including 49M0852K006, 49M0852L034, 753-05255, 753-05784, 791-180852, 791-180852B, 794-00042, and 794-00043. Troy-Bilt's 794-00082 listing is useful when checking the current catalog identity.
That history makes sourcing easier, but it doesn't make every plug with a similar thread interchangeable. An alternative must agree with the engine's required reach, seat style, heat range, terminal arrangement, and gap. A plug that threads in can still be the wrong plug.
The meaningful comparison is specification first
Independent catalogs identify Champion RDZ4H as an equivalent reference and commonly list the same core service dimensions, 10 mm thread diameter, 12.7 mm reach, 16 mm hex, and 0.7 mm gap. Use that reference when a dealer stocks Champion under its own numbering, but verify the engine application rather than relying on the name alone.
| Brand | Part Number | Resistor or Non-Resistor | Notes |
|---|---|---|---|
| MTD-family OEM | 794-00082 | Verify catalog listing | Current OEM reference |
| MTD-family OEM | 794-00042 and 794-00043 | Verify catalog listing | Earlier identifiers superseded by the current number |
| Champion | RDZ4H | Resistor equivalent | Common cross-reference in independent catalogs |
| MTD-family OEM | 753-05255 and 753-05784 | Verify catalog listing | Earlier cross-reference numbers |
| MTD-family OEM | 791-180852 and 791-180852B | Verify catalog listing | Earlier identifiers found in replacement catalogs |
What a cross-reference cannot prove
A cross-reference proves that a catalog considers the numbers related. It doesn't prove that the plug is correct for every engine with the same brand name. Engine variants can use different ignition specifications, and an equipment manufacturer may fit more than one engine family to a chassis over its production life.
Before ordering, compare the old plug and the replacement listing. Confirm the 10 mm thread, 12.7 mm reach, 16 mm hex, and specified gap, then check the engine manual or parts diagram. If those details disagree, stop and find the engine-specific part.
A separate APR ignition product illustrates the same purchasing principle from another category. A plug's thread and hex can look familiar while its reach and heat specification differ. Visual similarity is not fitment evidence.
Brand and Equipment Coverage
794-00082 is a shared MTD-family engine part, not a plug assigned to one chassis badge. Catalog coverage includes Craftsman, Cub Cadet, Troy-Bilt, Yard Man, Yard Machines, and Ryobi equipment, particularly small four-cycle outdoor-power units. That broad coverage narrows the search, but the engine model confirms the order.
Read the engine identification label or stamped code before buying. Manufacturers can install different engines under the same equipment brand, and older machines may have changed engine suppliers during production. The spark plug belongs to that engine, not just to the name printed on the handle, frame, or fuel tank.
Fitment details by equipment type
- String trimmers: Remove or loosen the shroud only as far as needed to reach the plug. Restricted access makes it easy to damage the ceramic or misroute the ignition lead.
- Leaf blowers and blower-vacuums: Check the engine label on the housing, often near the starter assembly or fuel tank. The blower-vac model name alone does not identify the engine.
- Tillers: A frame or tine guard can limit socket clearance. Record the engine code before removing surrounding covers, then use that code in the parts diagram.
- Edgers and cultivators: Similar small engines may appear across several MTD-family chassis. Match the engine diagram rather than assuming adjacent models share the same plug.
- Other four-cycle units: Use the OEM parts record only when it lists 794-00082 or a confirmed superseded number.
A reliable lookup path
- Read the engine label. Record the engine model, not only the equipment model.
- Open the engine parts diagram. Check the ignition or maintenance section.
- Confirm the plug number. Look for 794-00082 or a listed earlier identifier.
- Compare the old plug. Check thread, reach, hex, and terminal style.
- Verify the gap. Follow the engine manual because catalog listings may not show the final setting.
For a Cub Cadet CC214SN tiller, identify the engine fitted to the machine first, then search that engine's diagram for the spark-plug number. The Cub Cadet badge alone does not confirm fitment.
The Audi V6 supercharged maintenance article reflects the same platform-based purchasing principle in a different vehicle category. Identify the engine model first, then search that engine's parts diagram. The chassis badge alone will not confirm the plug.
When to Replace the Plug
The sensible replacement policy depends on how the machine behaves and how much downtime costs you. Proactive replacement before the main operating season removes a cheap, common variable before the first demanding job. Symptom-driven replacement avoids changing a plug that still starts cleanly, idles evenly, and accelerates without a miss.
The available parts coverage identifies 794-00082 as an active OEM replacement for equipment such as four-cycle trimmers, blowers, tillers, and cultivators, but it doesn't establish a universal service interval. Use the engine manufacturer's maintenance schedule first. If the manual is missing, inspection and condition are more reliable than an invented calendar rule.
Proactive replacement makes sense when
Replace the plug during a seasonal service when the machine has been stored poorly, has a history of hard starting, or is part of a fleet where a failure during work costs more than the part. A new plug also gives you a known baseline after cleaning the air filter, checking fuel, and servicing the machine.
Look for these replacement triggers:
- Cracked ceramic: The insulator is unsafe to keep in service.
- Oil-wet electrode: Investigate the underlying cause, then replace the contaminated plug.
- Heavy carbon bridging: Deposits can create a leakage path and weaken ignition.
- Damaged or rounded electrode: The firing edge no longer has its intended geometry.
- Gap outside specification: Reset only when the electrodes remain sound. Replace the plug if the electrode or insulator is damaged.
Symptom-driven replacement has limits
If the engine starts reliably, carries load, and shows no misfire, removing the plug for inspection may be enough. Cleaning can restore a lightly dirty plug, but it won't repair cracked insulation, eroded electrodes, or contamination caused by an unresolved fuel problem.
A fresh plug is preventive maintenance, not a diagnostic shortcut. If the new plug produces the same symptom, the next suspect is usually elsewhere in the system.
Seasonal storage deserves attention because stale fuel and deposits can foul a plug, but the plug may only be the visible result. A replacement fixes the ignition surface. It won't clean a carburetor, restore a restricted fuel line, or correct an air leak.
Ruling Out Other Causes Before Blaming the Plug
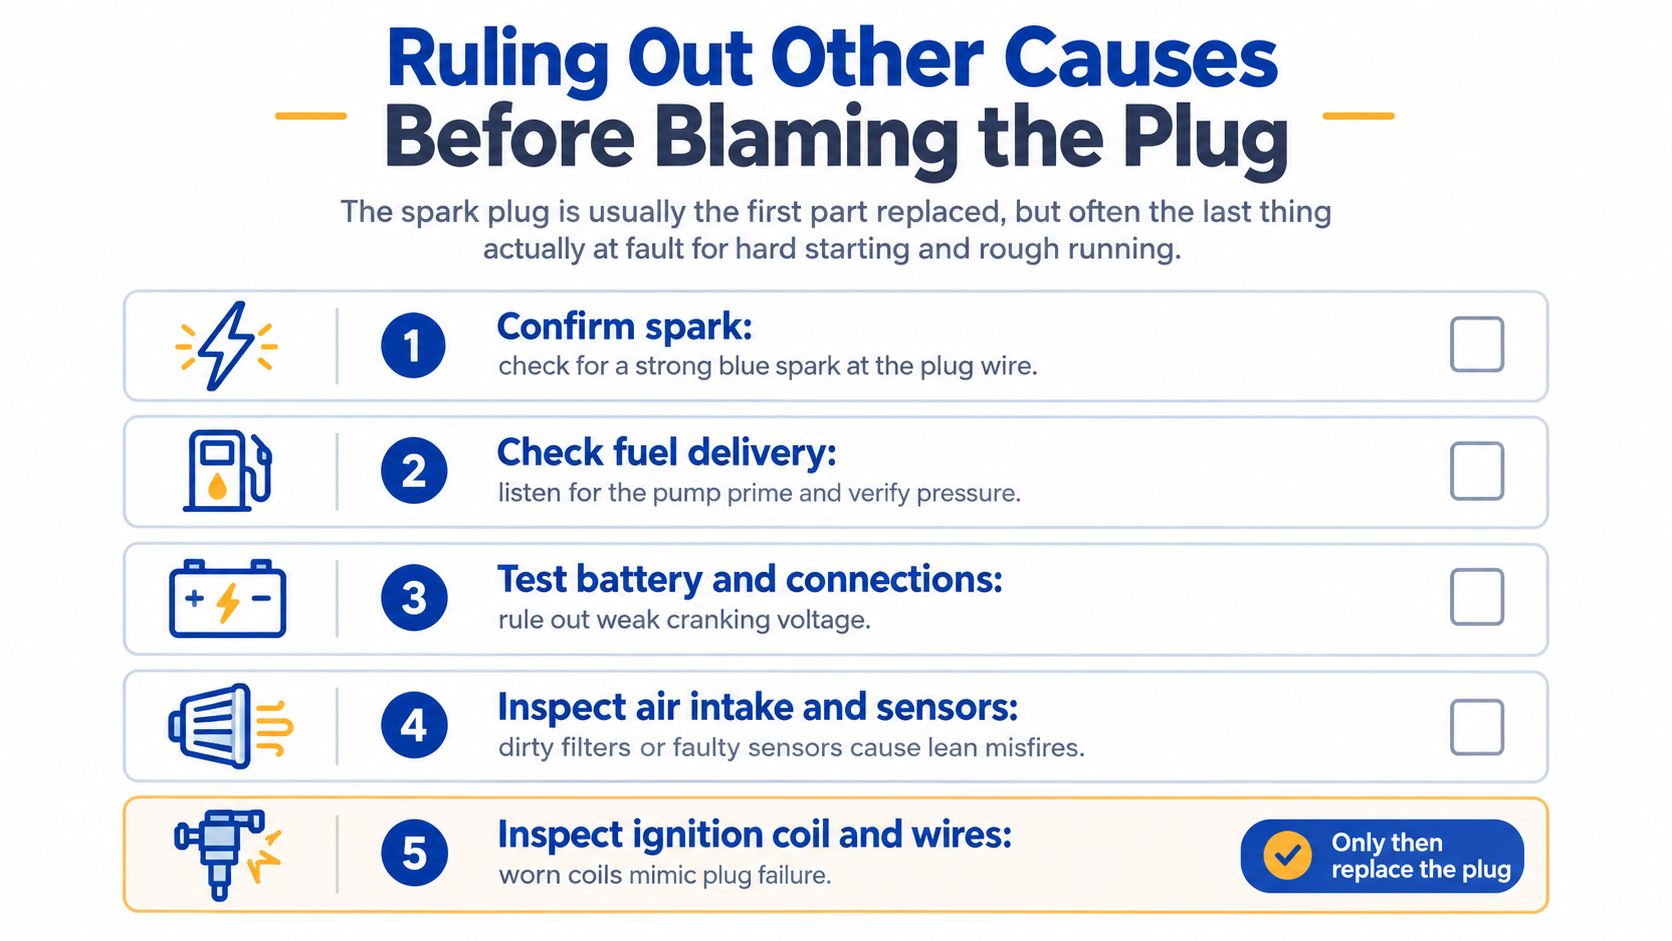
Most owners replace the spark plug first because it's accessible, inexpensive, and easy to understand. In practice, hard starting and rough running often come from fuel delivery, a restricted air path, carburetor deposits, or a weak ignition connection. The plug can show the evidence without being the original fault.
Start with a basic spark check. Remove the plug, reconnect the boot, ground the plug body firmly against clean engine metal, and crank the engine while keeping hands clear of the electrode. A weak or absent spark points toward the ignition circuit, but a visible spark under atmospheric conditions doesn't prove the plug will fire reliably under compression.
Follow the fault instead of the part
Check fuel next. Confirm that the tank contains fresh fuel, the primer bulb moves fuel, the filter isn't blocked, and the line isn't cracked or collapsed. On carbureted equipment, a stuck float, varnish in the bowl, or a blocked jet can mimic ignition failure.
Air problems are just as common. Inspect the filter, intake opening, choke linkage, and gasket surfaces. A rich mixture can leave the plug wet and black, while a lean mixture or intake leak can leave it unusually dry and pale. Those appearances are clues, not a reason to install a plug repeatedly without correcting the mixture.
The spark-plug and ignition fault guidance follows the same diagnostic discipline used in other engine systems. Test the circuit, fuel, and air path before assigning blame to one replaceable component.
Before buying another plug, ask:
- Does the engine have fresh fuel?
- Does the primer or fuel system deliver fuel?
- Is the air filter clean and the intake unobstructed?
- Is the carburetor free of stale-fuel deposits?
- Does the ignition boot fit tightly?
- Does the plug's condition indicate a mixture or oil problem?
Installation and Gap Setup
Install 794-00082 with the engine cold and the cylinder head clean. A careful installation matters because small-engine heads are often aluminum, and cross-threading or over-tightening can turn a simple maintenance job into a repair.
Prepare the plug and cylinder head
- Remove the boot correctly. Twist and push the boot loose before pulling it away. Pulling the wire can damage the conductor or terminal.
- Clean around the plug. Blow or brush debris away from the cylinder head so grit doesn't fall into the plug hole.
- Inspect the replacement. Check the ceramic, shell, gasket, and terminal for damage.
- Measure the gap. Set it to the engine specification. The commonly cited service gap for this part is 0.7 mm, and independent parts data lists the same core specification.
Use a wire-style gauge rather than forcing a flat blade between the electrodes. The wire should pass with light, controlled resistance. Adjust the ground electrode carefully, and make sure it remains square over the center electrode.
Thread it by hand first
Place the plug into the socket and lower it straight into the hole. Turn it by hand for several complete threads. If it binds immediately, remove it and inspect the alignment. Never use a ratchet to force a plug into an aluminum head.
Once the gasket seats, tighten according to the engine manufacturer's specification. If no service figure is available, use a torque wrench and the engine maker's guidance rather than relying on a universal value. Avoid treating “a quarter turn” as a substitute for correct information, because gasket thickness and seat condition affect the final angle.
Anti-seize is not automatically required. It can change the friction at the threads and lead to over-tightening, so follow the plug and engine guidance. Keep grease out of the boot, then press the boot firmly onto the terminal until it's fully seated.
Start the engine and listen for a clean idle and consistent acceleration. If the machine still runs poorly, return to the fuel and air checks rather than tightening the plug further or swapping plugs at random.
Quick Reference and Buying Checklist
Use this bench card to prepare the order, then verify the application against the engine manual. 794-00082 is a catalog plug used across MTD-family outdoor equipment, so the chassis brand alone does not establish fitment.
794-00082 Quick Reference Card
| Spec | Value |
|---|---|
| OEM reference | 794-00082 |
| Thread diameter | 10 mm |
| Reach | 12.7 mm |
| Hex size | 16 mm |
| Common listed gap | 0.7 mm |
| Common catalog equivalent | Champion RDZ4H |
| Equipment coverage | MTD-family outdoor power equipment |
| Main fitment check | Engine model and service manual |
Before ordering, check the details that determine whether the plug will fit:
- Read the engine identification. Use the engine model and service information, not only the mower, trimmer, or tractor brand.
- Compare the old plug. Match the thread, reach, 16 mm hex, seat, and terminal style.
- Confirm the gap. Measure with a wire gauge and follow the engine manual. Do not assume every listing arrives correctly set.
- Search older documentation. Superseded references may include 753-05255, 753-05784, 791-180852, 791-180852B, 794-00042, or 794-00043.
- Buy a traceable part. A genuine OEM plug or a clearly documented equivalent is safer than an unlabeled copy.
- Keep one spare if downtime matters. Stock it only after verifying the same engine application.
Independent parts listings show a $6.99 MSRP in 2026, while dealer pricing may differ. Treat price as a comparison point, not proof of compatibility. A low-cost plug with uncertain dimensions can create more troubleshooting work than a properly documented replacement.
For workshops that also service Audi platforms, Vorsprung Autowerk provides ignition coils and spark plugs with fitment-focused product documentation. Apply that same discipline here: verify the engine model, dimensions, gap, and superseded numbers before placing the order.


