

You've fitted a GP Ice heat exchanger to your S4, or installed an ÜberBrick on an EA837, expecting the cooling system to behave more consistently under repeated pulls. Then the temperature reading looks odd, a fan-related fault appears, or the car seems to pull timing despite the hardware change. The upgrade may be working, but the sensor signal the ECU relies on might not reflect what's happening across the cooling circuit.
That distinction matters on both the supercharged EA837 and twin-turbo EA825. A cooler temperature sensor doesn't lower coolant temperature. It reports conditions to the control module, which uses that input to manage engine operation and cooling-system responses. If the reported value is wrong, the ECU can make sensible decisions based on bad information.
Table of Contents
- Why the Cooler Temperature Sensor Matters on Your Audi
- How the Cooler Temperature Sensor Works
- Where Audi Mounts the Sensor on EA837 and EA825 Models
- Symptoms That Point to a Failing Cooler Temperature Sensor
- Testing the Sensor Before You Replace It
- OEM Versus Aftermarket Sensor Options for Audi Platforms
- Replacement Workflow and What to Do After the New Sensor Is In
Why the Cooler Temperature Sensor Matters on Your Audi
A supercharged Audi that feels heat-soaked after repeated pulls can send an owner looking first at the heat exchanger, pump, or intercooler brick. Those parts matter, but the ECU also needs a credible temperature signal to decide how to respond. A reading that lags, sticks, or drifts can make a healthy upgrade look ineffective, or cause the control system to react in a way that doesn't match actual conditions.
The sensor is the link between cooling hardware and control logic. It doesn't move coolant or extract heat. It tells the ECU what temperature it detects, so the control unit can make decisions about fueling, ignition timing, idle targets, fans, and pump operation. The sensor's role becomes more important after modifications, because a changed cooling setup can alter how temperatures behave under load and during recovery.
The upgrade and the reading are different things
Consider an S4 owner who installs an upgraded heat exchanger, then sees a temperature-related code or unexpected fan behavior. The first question shouldn't be whether the new part is automatically at fault. Check whether the ECU's coolant reading makes sense beside the engine's actual behavior, and whether the sensor circuit and harness are intact.
A heat exchanger upgrade can change the cooling system's response, but it doesn't make the factory sensor a direct measure of every part of the system. One value can't describe every coolant passage, heat exchanger, intercooler circuit, or heat-soaked component. If the objective is to assess an upgrade, the sensor reading needs context, including operating conditions and the behavior of the rest of the circuit.
Practical rule: Treat the sensor as a reporter, not a cooling component. A truthful reading lets the ECU manage the system; a misleading reading can undermine the benefit of sound hardware.
Owners comparing heat-exchanger options should understand what the upgrade changes and what it leaves to the factory control strategy. This overview of Audi heat-exchanger upgrades provides useful context for that hardware side of the diagnosis.
How the Cooler Temperature Sensor Works
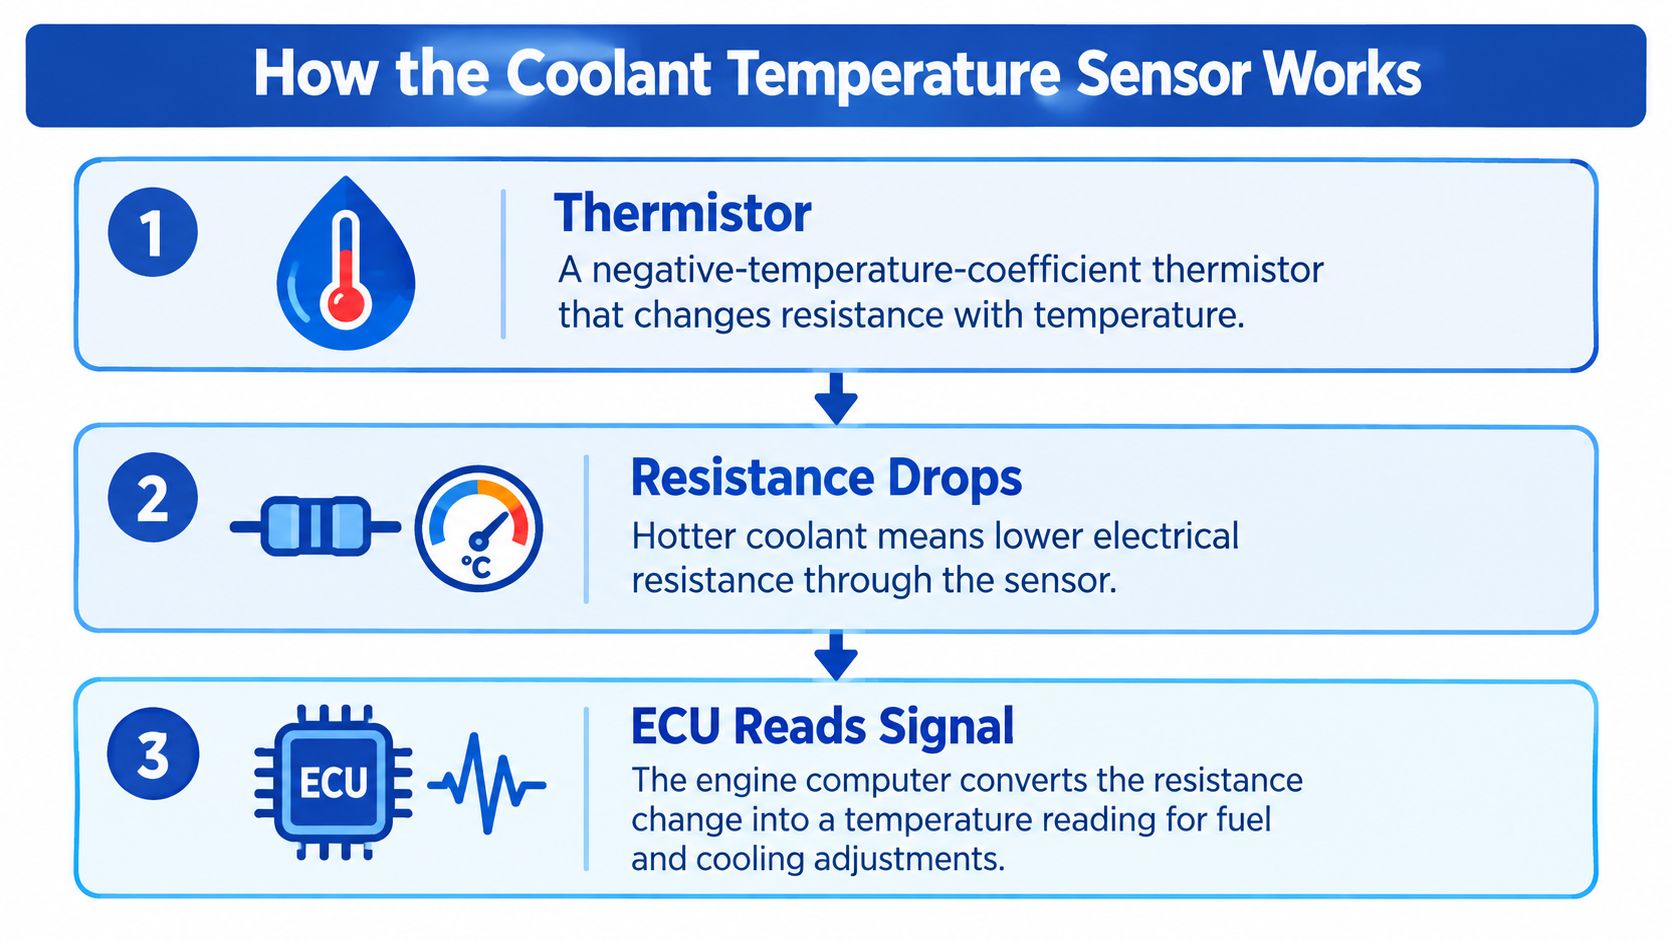
The cooler temperature sensor is usually an NTC thermistor, short for negative-temperature-coefficient thermistor. "Negative" describes the direction of the relationship: as coolant temperature rises, the sensor's electrical resistance falls. The ECU supplies a reference voltage, commonly around 5 volts, and reads the changing signal voltage as temperature. The thermistor principle has been used for automotive temperature sensing since the late 1940s, evolving from dashboard-gauge applications to electronic engine control (thermistor background and automotive applications).
Resistance sets the voltage the ECU reads
The resistance change works like a path that narrows when coolant is cold and opens as it warms: the harder it is for current to pass, the higher the signal voltage the ECU sees. The relationship is not a straight-line scale, so the ECU applies a calibration curve instead of treating each step of resistance as an equal step of temperature.
A representative sensor may measure about 2–6 kΩ at 25°C and around 300 Ω at 80°C (HELLA's temperature-sensor technical information). Those figures show the direction and broad shape of the curve. Diagnosis should always use the resistance table for the exact sensor fitted. An open circuit reads to the control unit as extreme cold, while a short reads as excessive heat, and either fault corrupts the decisions the ECU makes next.
From signal to engine decisions
The ECU converts the signal into a coolant-temperature value and uses it to adjust fuel delivery, ignition timing, idle strategy, and cooling-fan operation. The same value reaches a scan tool through OBD-II as PID 0105. OBD-II has standardized this parameter since the 1996 model year, and freeze-frame data records the operating conditions present when a fault sets.
On a modified car, that conversion chain matters more. A GP Ice heat exchanger or an ÜberBrick intercooler pulls more heat out of the charge-cooling circuit, so the sensor value should fall faster during recovery and hold lower under sustained load than it did on stock hardware. When the displayed number ignores that pattern, flat after a pull or stuck high at idle, suspect the sensor circuit or its harness before the new part. A scan-tool reading is one point in one circuit, interpreted through a calibration, and on an upgraded car the honest test is whether the number behaves the way the hardware now should.
Where Audi Mounts the Sensor on EA837 and EA825 Models
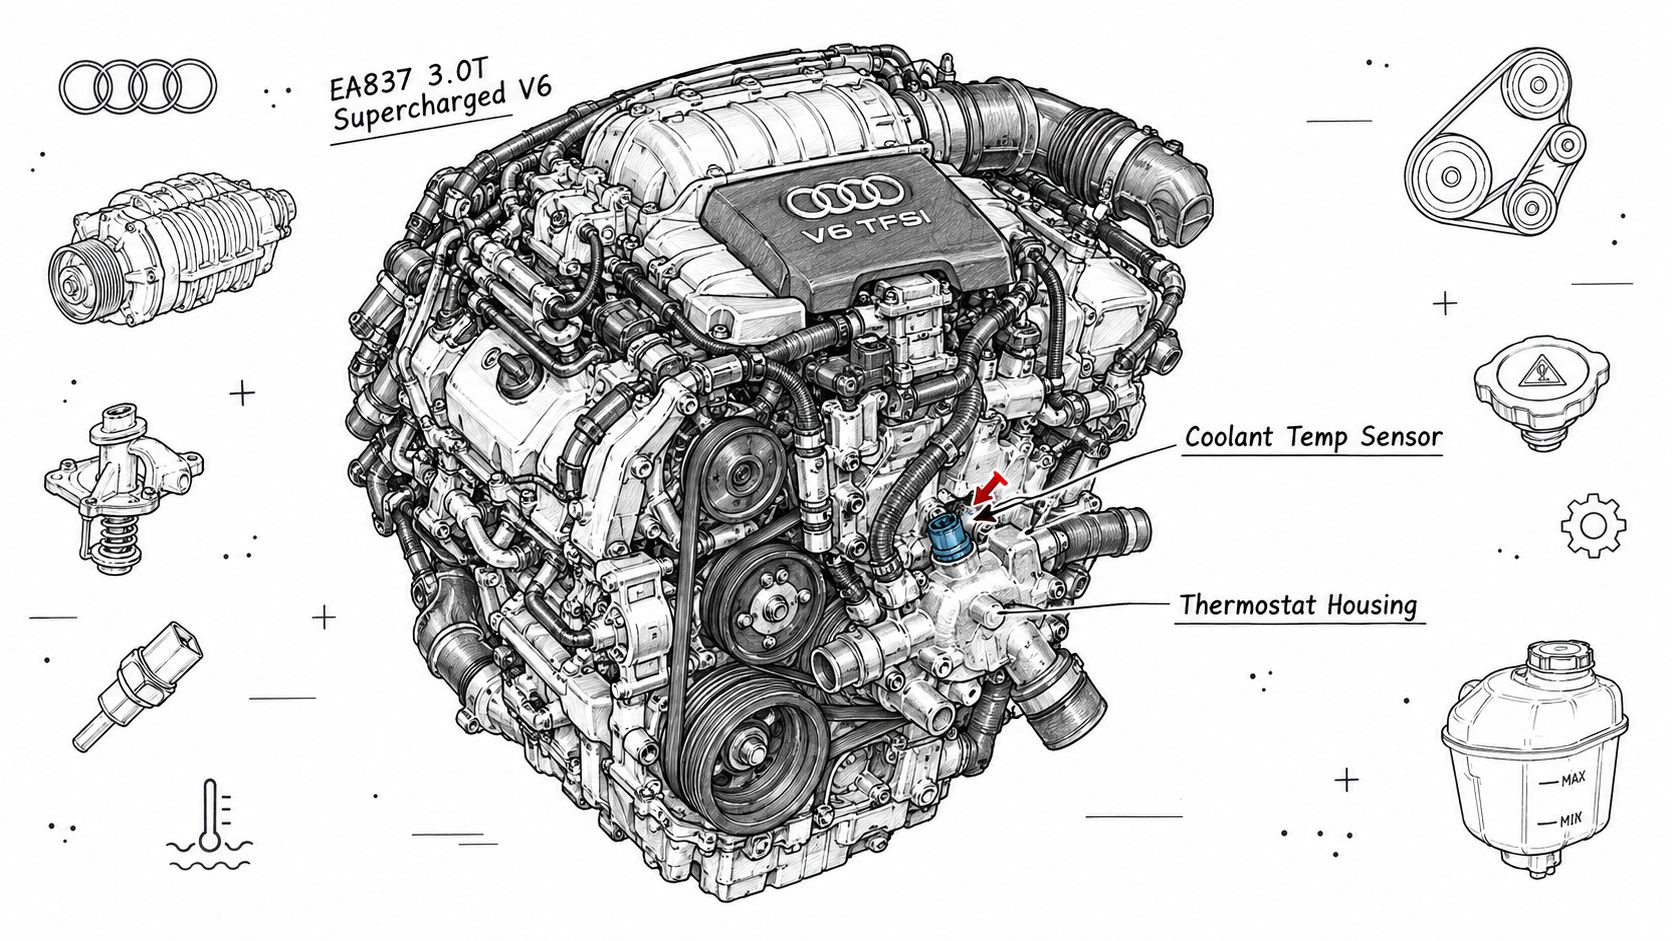
On an EA837 3.0T, start by identifying which temperature input you're tracing. The engine coolant-temperature sensor and the charge-air temperature sensors do different jobs. The EA837 appears in applications such as the B8 and B8.5 S4 and S5, Q5 and SQ5, A6, and A7, but exact locations and connector details depend on model year and configuration.
Separate coolant readings from charge-air readings
The coolant sensor reads engine coolant. Charge-air sensors, located in the intake path downstream of the supercharger and around intercooler plumbing, report air-temperature conditions instead. An owner who has installed an upgraded brick may be watching an intake or charge-air value and assuming it's the engine coolant signal. Before testing or ordering a part, confirm the sensor identity using the vehicle's wiring information, scan-tool labels, and the connector location.
The same caution applies to the EA825 4.0T twin-turbo V8, used in models including the C7 RS6 and RS7 and the Q7. Multiple temperature inputs may cover engine coolant, charge air, and intercooler outlets. Don't assume that a connector style or similar-looking sensor body means two sensors are interchangeable. Part numbers and fitment can vary with model year and system layout, and the information provided here doesn't establish a universal shared part number across these applications.
Owners assessing an upgraded supercharger brick can use this overview of the ÜberBrick cooling system to understand the hardware context. It doesn't replace vehicle-specific service information for locating a sensor or confirming its part number.
Inspect the connector and harness, not just the sensor
Heat and vibration can age wiring and plastic connectors around the engine. Look for a loose lock, damaged insulation, corrosion, or a harness that's been pulled tight against a hot or moving component. A poor connection can interrupt or bias the signal, so replacing the thermistor alone won't fix a fault caused by the plug, wiring, or ground path.
The video below offers another visual reference for engine-bay components. Use it as orientation, then verify the sensor location on the specific vehicle before disconnecting anything.
Symptoms That Point to a Failing Cooler Temperature Sensor
An EA837 that already runs a GP Ice heat exchanger or an ÜberBrick brick does not cool like a stock car, and that is exactly the trap. Owners see unfamiliar temperature behavior after the upgrade and either blame the new hardware or wave it off as normal, while a drifting sensor feeds the ECU numbers that no longer match the coolant.
Cold starts are the most common tell. The engine cranks longer than it should on a cool morning, then runs fine for the rest of the day. The ECU decides cold-start fueling largely from the coolant temperature input, so a reading that falsely indicates operating temperature during a cold soak is a documented cause of hard starting on these engines. A scan-tool value that sits well above ambient before the first start of the day is the version of this fault you can see.
Gauge and live-data oddities come next: a reading that sticks for minutes, jumps in steps instead of climbing smoothly, or disagrees with how hot the engine bay feels after a pull.
The cooling response doesn't match the car
Fans staging up at the wrong time, or not staging at all, point to a biased input because the ECU commands them from this signal. An idle that hangs high, fuel trims that wander under light load, and power that fades inconsistently across repeated pulls all fit the same picture, since the supercharged and turbocharged engines lean on coolant data for their protection strategy.
That last symptom confuses modified cars most. A real ÜberBrick or GP Ice install changes intake temperatures and coolant recovery rates, so a soft third pull can be genuine heat soak. Or it can be a sensor reporting a stale value while the ECU pulls timing. Verify the signal before you condemn the intercooler.
A biased sensor also isn't the only cause of odd fan or temperature behavior. A stuck coolant control valve produces similar complaints, and this guide to Audi coolant-control valves helps keep that separate fault on your list before you order parts.
On a modified car, don't confuse a real change in heat behavior with a faulty temperature signal. Verify both before changing parts.
Testing the Sensor Before You Replace It
On a stock EA837 or EA825, a lazy coolant temperature signal can hide for weeks. On a car already running a GP Ice heat exchanger or an ÜberBrick intercooler, the margin for error shrinks because the cooling system now recovers faster than the factory calibration expects, so a biased sensor can make a healthy setup look heat soaked or make real heat soak look like a failed brick.
A practical diagnostic sequence
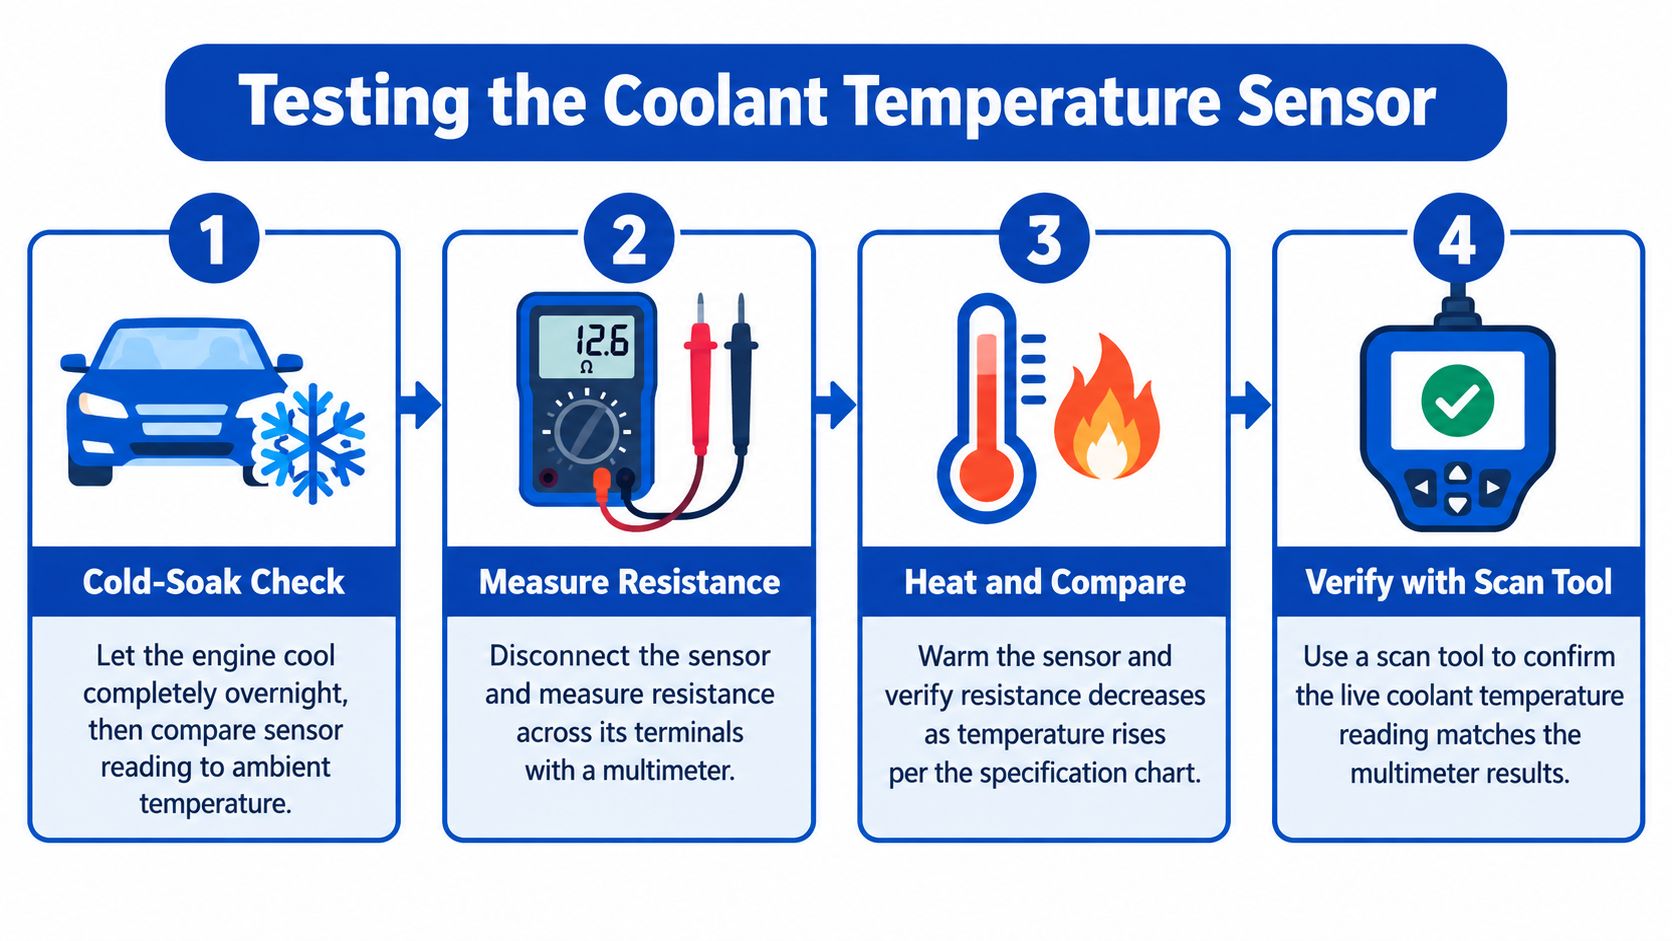
- Compare cold-soak temperature with ambient. After the car has sat long enough to equalize, read coolant temperature on a scan tool and compare it with ambient. As noted earlier, factory plausibility checks expect close agreement after a prolonged soak. A clear gap means the signal is already suspect before the starter turns.
- Watch warm-up as a trace, not a number. The value should climb in a clean curve while the thermostat and control valve manage flow. Flex the sensor connector and the first few inches of harness while watching live data. If the reading steps, drops out, or spikes when the loom moves, chase terminals, grounds, and chafed wiring before the thermistor.
- Measure resistance off the car or with the circuit isolated. Put a multimeter across the sensor terminals and compare the reading with the exact temperature-resistance table for that part number. Resistance should fall as temperature rises. A generic chart from another Audi engine can pass a bad sensor and fail a good one.
- Prove the harness before blaming the part. With the sensor unplugged, confirm the reference supply and ground path at the connector, then inspect for green corrosion, spread terminals, and coolant wicking inside the boot. Many Audi temperature circuits use roughly a 5-volt reference, but use the wiring diagram and meter procedure for the specific model.
Freeze-frame data adds the context that a single snapshot misses. It captures sensor values when a code sets, so you can see whether the fault happened at cold start, stabilized warm operation, or during a hard pull where the upgraded heat exchanger should be recovering.
Treat the sensor like any other input: verify signal, circuit, then component. The same discipline applies when tracing an Audi MAF sensor fault, where a code names the sensor but the actual failure can sit in the connector, intake leaks, or voltage supply.
OEM Versus Aftermarket Sensor Options for Audi Platforms
The right replacement is the one that reports temperature accurately and maintains a reliable electrical connection in the vehicle's actual conditions. An OEM Audi sensor offers a known fit and calibration for the specified application. A quality aftermarket option can be appropriate if it matches the correct electrical specification and connector design. A cheap unbranded sensor is the gamble: it may fit physically yet drift or report inaccurately.
An upgraded heat exchanger or intercooler brick doesn't automatically call for a different sensor. The sensor's job is to report what it measures, not to make the system read cooler. If the factory sensor remains plausible and the circuit is healthy, changing the cooling hardware alone isn't a reason to replace it.
| Criterion | OEM Audi Sensor | Quality Aftermarket | Cheap Unbranded |
|---|---|---|---|
| Calibration | Specified for the matching application | Acceptable when its resistance curve matches the required specification | May drift or fail to track temperature accurately |
| Connector and seal | Intended to fit the original connection and sealing arrangement | Check terminal fit, seal design, and material quality | Fit and sealing can be inconsistent |
| Modified cooling setup | Reports temperature without needing a special upgrade-specific calibration | Can work if the signal remains within the correct specification | A misleading reading can complicate diagnosis after hardware changes |
| Fitment confidence | Confirm the part number against the vehicle | Verify vehicle and connector compatibility before installation | Don't rely on appearance alone |
Make the choice from test results
Ask three practical questions before buying: Does the sensor match the manufacturer's resistance curve? Does the connector seal correctly and lock securely? Can the scan tool show a plausible reading after the cooling setup has changed? If those checks point to the factory sensor, staying with the correct OEM part is straightforward. If choosing aftermarket, buy by verified specification and fitment, not by a listing that only says it fits an Audi.
Replacement Workflow and What to Do After the New Sensor Is In
On an EA837 or EA825 that already runs a GP Ice heat exchanger or an ÜberBrick intercooler, I treat the sensor swap as the last step after the cold-soak check and circuit inspection point the same way. Work on a fully cool engine, confirm the exact sensor location and part number from vehicle-specific service information, and stage the correct coolant before opening the circuit. Clean the connector face, check the harness for chafing at brackets and near the heat-exchanger plumbing, then inspect terminal tension and the seal before unplugging anything.
After installation, refill and bleed the system with the correct procedure and coolant for the vehicle, including electric-pump or vacuum-fill steps where the platform calls for them. Confirm the reading tracks ambient temperature after an overnight cold soak before clearing codes and calling the repair complete. Then clear faults, start the engine, and watch the scan-tool PID rise in a clean curve instead of trusting the dashboard display.
On modified cooling hardware, log coolant temperature with blower, pump, and heat-exchanger fan state under the same pull or cruise each time. A larger brick or faster coolant flow can leave one sensor looking calm while another part of the circuit is still heat-soaked, so compare the trace to a known-good EA837 or EA825 with the same setup rather than to a stock expectation. If the signal still lies, go back to connector fit, harness continuity, grounds, and the cooling controls before buying more parts.
Use the factory fill spec and service interval from this Audi guide to G13 coolant when you refill. For platform-specific cooling upgrades, maintenance parts, and Audi fitment support, visit Vorsprung Autowerk. The useful result is a plausible signal the ECU can use to command fans and pumps correctly.


